If you've been around here for a while, I'm sure you already know about my deep love for cooking with kids. There are SO many great reasons to cook with children, but have you ever wondered how you'll actually facilitate an engaging cooking lesson? If so, this post is for you! Today we're talking about 3 must-have strategies for boosting engagement in cooking lessons!

How Can Cooking Benefit Kids?
Before we dive into my strategies, I wanted to take a minute to remind you of all the benefits of cooking with kids! I wrote a whole blog post on this, but as a quick overview, here's what you can expect:

- Language Skills
- Fine Motor Skills
- Motivation
- Sensory Experience
- Articulation
- Social Skills
- Self-Esteem
- Cognitive Development
- Life Skills
- Create Memories
Pretty awesome, right?! I definitely think so!
Adding cooking lessons to your speech sessions will help you target more skills with ease while maintaining active student engagement. If you're convinced you NEED cooking in your life (and you do!) let's jump into how to craft super engaging cooking lessons!
1. Introduce The Activity

First up, you'll want to make sure you introduce your kiddos to the activity you have planned in the simplest way possible. There are a few ways to do this, but I personally think pictures are best! I like to show children a picture of the finished product.
For example, if I'm planning to make my S'mores on a Stick recipe, I'll show kiddos a picture of the final creation. You can typically find a picture of any of my recipes in the resource or on my website. If you're using a recipe that doesn't have a photo, do a quick search on Google or Pinterest to find something comparable. Alternatively, you can always make a quick sketch to give children an idea of what you're working on.
Once kiddos have seen a picture of what you're making, take a couple of minutes to talk about the recipe. You can tell them the name, provide a few basic details and maybe even play a little guessing game about ingredients you might need to make it. Overall, just keep this step simple and as visual as possible for your little learners!
2. Present Your Visuals
Visual supports are key in making your cooking lessons GREAT! I speak about the importance of visual supports pretty regularly, but this is especially true when it comes to cooking lessons. Visuals will allow you to target more skills and learning goals before you even start the cooking lesson!
Use visual supports as a way to incorporate vocabulary by going over each material, tool, and ingredient you will be using. In addition to helping children learn new words, visuals can help increase memory skills, social communication abilities, and understanding of the environment and community.
Here are a few examples to get you started:
-
SNACK CHOICES: Using a board with visuals for snack options is fantastic for helping children learn to make and verbalize choices. Your visuals could include individual pictures or a small grid of different snack options. You might use these visuals by asking questions like: "Do you want to make a pretzel flower or apple pizzas today?"

- CORE WORDS OR CORE BOARD: Using a board with core words is great for helping children learn to communicate thoughts and feelings as well as express opinions. For example: "I like", "I don't like", "It was good", or "It was bad" are all phrases that could be included on the core board.
- VISUAL SCHEDULE: Having a visual schedule can help with transitions during your cooking lesson because the student knows what to expect and can see what is happening now and what comes next. Using a visual schedule will help develop independence and consistency in your cooking lessons.
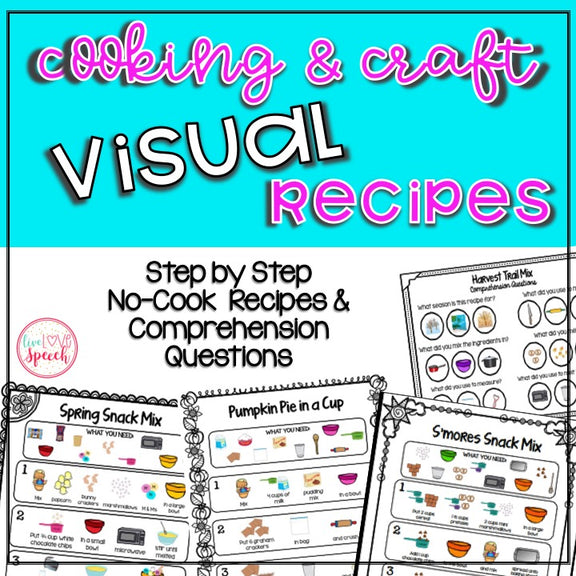
- VISUAL RECIPES: Finally, this one is my favorite visual of all! Using pictures of all the ingredients, tools, and materials you will be using is my BEST tip for making your cooking lessons ultra-engaging. I like to include both images and words on our visuals. Step-by-step directions are also super helpful for illustrating recipes to children. My visual recipe cards do just that to help students with sequencing, following directions, and more. I like to give each student their own copy of the visual recipe or let a few students share so everyone can clearly see the steps.
3. Assign Jobs to Children
Finally, once you've done your introduction and gone over your visuals, assign each kiddo a "job". This strategy is key for boosting engagement in cooking lessons because it will allow every child to be actively involved instead of just watching.

These jobs don't need to be complicated and can be as simple as measuring an ingredient, pouring a liquid, taking a turn mixing, crushing cookies, etc. Think about the number of kiddos you have, and the number of steps in your recipe ahead of time to ensure everyone will get a chance to actively participate!
Another option is to specify that each student will get a turn to carry out an action like "mixing", for example. If you go this route, incorporate counting by having students count to 10 while mixing, then pass the bowl to the next student. If needed, you can also explain the order you will be going in terms of what student will go first, second, etc.
Providing children with details upfront about their "job" in the cooking lesson will create excitement and engagement as students await their turn. You'll also eliminate the potential for "fighting" over tasks, as each child will already know what their specific role will be.
Putting It All Together In Your Cooking Lesson
These 3 strategies are SUPER helpful for boosting engagement and creating a stress-free cooking lesson! I love using these 3 strategies in every cooking lesson to ensure my kiddos get the most out of each activity. In order to help make things run smoothly, take a few minutes before each cooking lesson to consider how you'll incorporate these strategies into each specific recipe.
If you're super excited to try cooking with the kiddos in your life, then don't wait! Grab the Visual Recipe Cards or the digital visual recipes and get cooking! Here are a few options for you to choose from:
Whatever you choose, I know that if you follow these 3 simple steps you can create some amazing and engaging lessons for your kids, students or clients!
Save This Post
Pin this post on your Pinterest board so you don't forget any of these key strategies for boosting engagement during cooking lessons!


